
When you purchase a new electric screwdriver, the excitement of unboxing and setup can be thrilling. This article will guide you through the electric screwdriver unboxing and setup process, ensuring you know exactly what to expect and how to get started efficiently.
What’s Inside the Box?
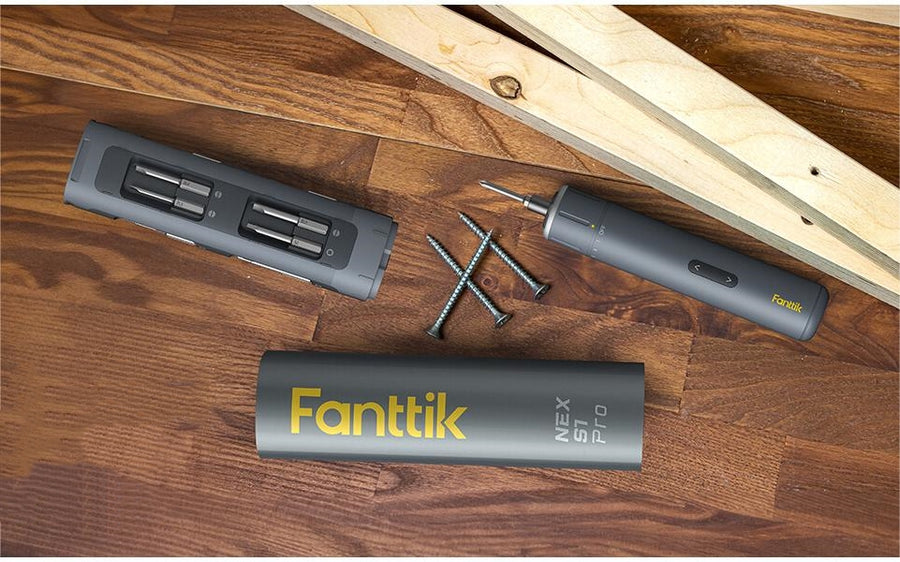
Upon opening the box, you will typically find:
- The electric screwdriver itself
- A variety of screwdriver bits
- A charging cable or docking station
- User manual and warranty information
Each of these components plays a crucial role in the functionality of your new tool. Understanding their purpose will enhance your experience during the electric screwdriver unboxing and setup.
Initial Inspection and Setup
After you have unboxed your electric screwdriver, it is essential to conduct a thorough inspection. Check for any visible damage or missing parts. If everything appears to be in order, you can proceed with the setup. But how do you set it up correctly?
First, charge the screwdriver fully before its initial use. This step is vital as it ensures optimal performance. Most electric screwdrivers come with a charging indicator that will inform you when the battery is fully charged. If you are unsure about the charging process, refer to the user manual for specific instructions.
Understanding the Features
Modern electric screwdrivers are equipped with various features that enhance usability. Some common features include:
- Adjustable torque settings
- Built-in LED lights for visibility
- Ergonomic design for comfort
Familiarizing yourself with these features during the electric screwdriver unboxing and setup will allow you to utilize the tool effectively. For instance, knowing how to adjust the torque settings can prevent over-tightening screws, which can damage materials.
Getting Started with Your Electric Screwdriver
Once your electric screwdriver is charged and you understand its features, you are ready to start using it. Begin by selecting the appropriate screwdriver bit for your project. If you are unsure which bit to use, consult the user manual or look for markings on the bits themselves.
As you work, remember to maintain a steady grip and apply consistent pressure. This technique will help ensure that your screws are driven in smoothly and securely. If you encounter any difficulties, don’t hesitate to refer back to the user manual for troubleshooting tips.
Conclusion
The electric screwdriver unboxing and setup experience can be both exciting and informative. By understanding what to expect and how to properly set up your tool, you can maximize its potential. For a high-quality option, consider checking out the  . This model offers advanced features that can elevate your DIY projects.
In summary, take your time during the unboxing and setup process. Familiarize yourself with your new electric screwdriver, and you will be well on your way to completing your projects with ease and efficiency.